 |
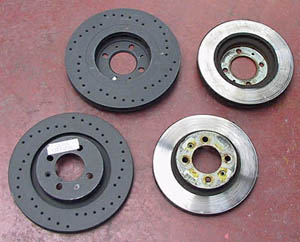
The kit comes with
two brand new 280mm discs, marked left and right, 4 x 40mm long cap head
screws, 4 x 50mm long cap head screws, 4 x plain washers, 4 x taper washers,
2 x calliper adapter brackets, 2 x disc centring rings.
Interesting things
to add to your shopping list:
- new brake pads (new discs require new pads)
- 4 x screw to fix the discs (as the original part could get damaged).
|
 |
Go ahead with jacking
up the front of the car and securing its position with a set of axle stands.
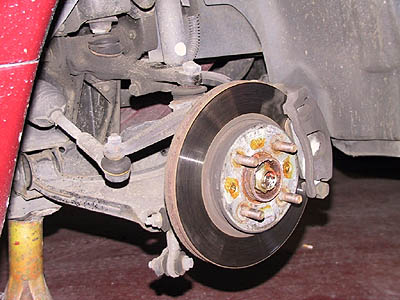
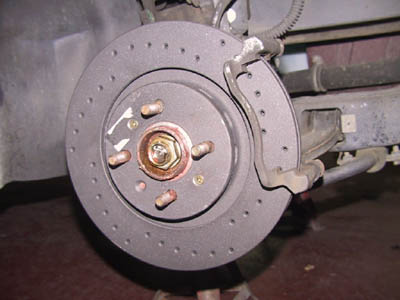
The picture at the
left shows the brake disc, brake calliper, both mounted on the wheel hub.
The orange marks are just grease, so it looks like this disc will come
of easy.
|
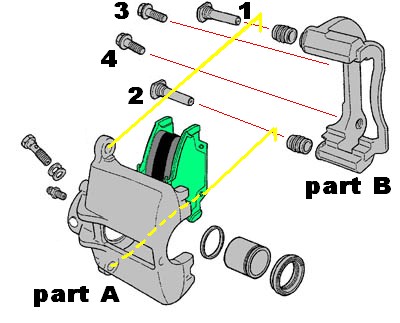 |
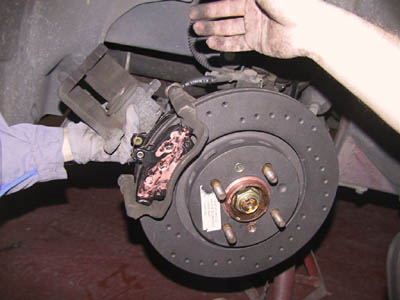
Remove part A (see
picture at the left) from the brake calliper by undoing bolts 1 and 2
(using a socket spanner). This action is followed by removing the 'old'
brake pads.
Remove the other part
of the brake calliper (part B) by unscrewing bolts 3 and 4. Don't disconnect
the hydraulics of the calliper, but place it in a position that is most
comfortable for the hydraulic piping. Use a small rope or cable wrap to
secure its position. The last thing you want is the situation where the
brake calliper drops and the hydraulics get disconnected or damaged.
|
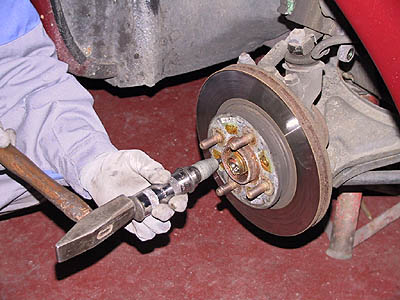 |
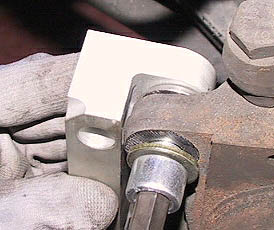
Next step: use an impact
screwdriver and a proper bit to loosen up the screws of the discs. Two screws
per disc. |
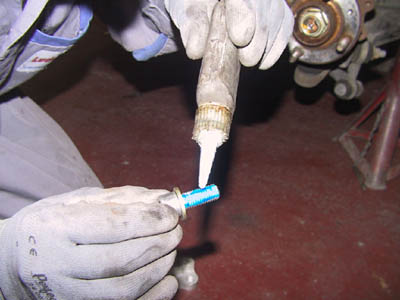 |
Use some Locktight
(sp?, a thread-locking compound) on the bolts which will secure the bracket
to the hub (the 40mm once).
The tapered washers
should be fitted so the taper clears the radius in the corner of the calliper
bracket.
Fit the calliper bracket with the two tapered spaced washers in between
the hub and the plain washer under the head of the cap head screw.
|
 |
|
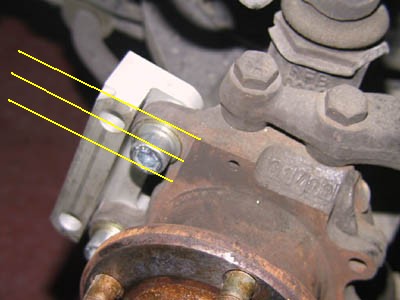 |
The bracket and washers
are fitted in this way that the surface of the hub where the bolt has its
hole and the surface of the bracket are in the same plane (as indicated
by the yellow lines on the picture at the left). It needs to be in this
way, as the calliper just needs to move in one direction (out of the center). |
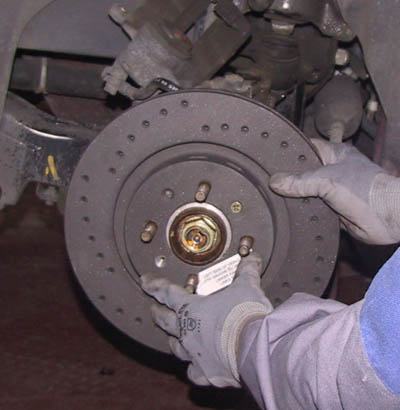 |
Place the centring
rings with the chamfer to the inside (or with the flat side to the outside,
which makes it easy to use a small hammer to bring it in its final position.
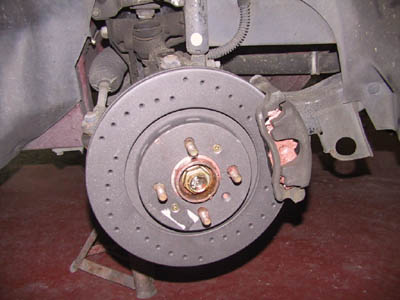
Mount the new disc
onto the hub and secure it with the two retaining screws (it could be
usefull to use a set new ones).
|
 |
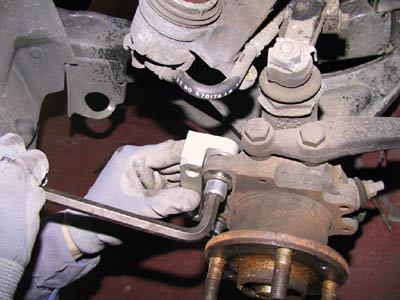
Use some Locktight
on the 50mm bolts and use them to fixate the calliper part B to the bracket.
(picture left, below and below at the left) |
 |
 |
 |
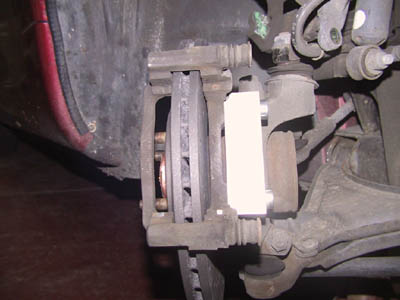
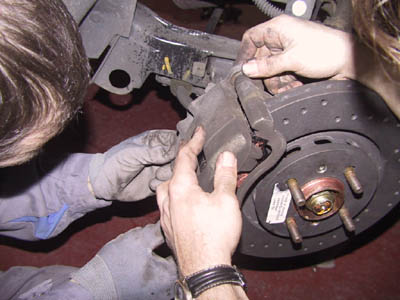
Use copper grease
or another more spoacialised product on the back (outside) of the new
pads and fit them at each side of the disc as shown in the picture at
the left.
Remove the other part
of the brake calliper from its secured position, and use a tool to press
the piston back in the calliper. There is no picture of this action, as
we didn't use the right tool for this, but it worked out fine (although
some serious power was required) . . .
|
 |
Once the piston is
moved back again, slide the calliper over the pads and make sure it fits
properly.
Use the old bolts
to secure its position again.
|
 |
Guess what, this brake
is finished, so put the wheel back on and start with the other side.
After finishing both
wheels and lowering the car, press the brake pedal 2 or 3 times to settle
the calliper piston before driving and avoid hard braking for the first
200 miles to allow the discs and pads to bed in.
|